
Core drilling machines Hand held core drill machine Special price 19 Jan 2026
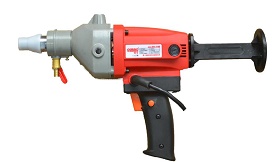 ICM OB110E Price R3,195+VAT max core bit 90 mm on walls ICM OB152E Price R4,995+VAT max core bit 120 mm on walls |
 Please scroll down for different sizes and prices
You can connect all of our core drilling machines to a normal gardening water hose to these machines |
||
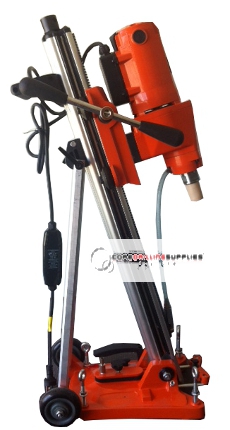
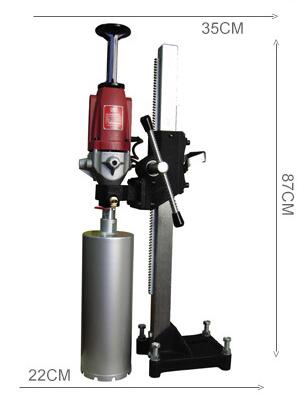 ICM OB152E with stand Price R6,495+VAT core bit max 120 mm on walls 90 mm on floors |
|||
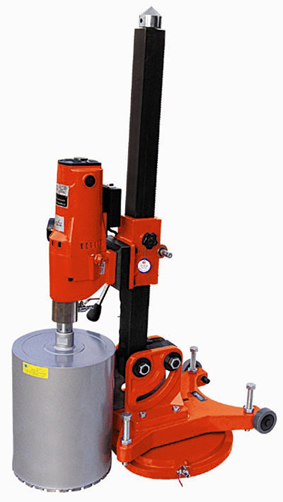
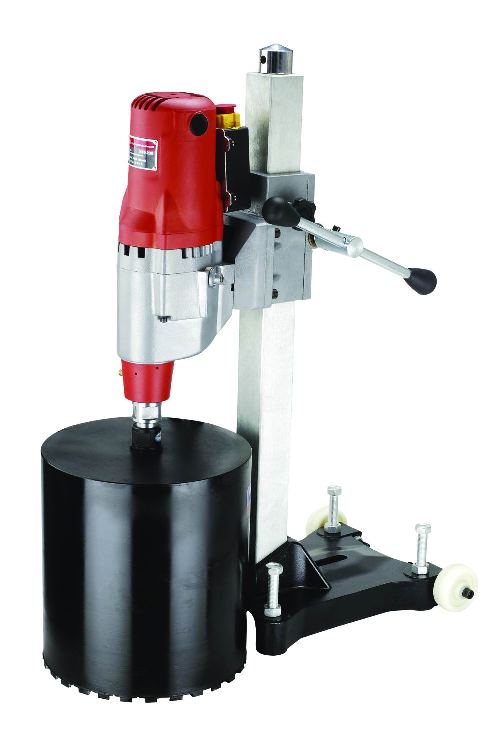 COR205 4280W with stand Price: R13,995 Excl VAT COR305 with stand Price:R18,595 Excl VAT COR405 with stand Price:R25,995 Excl VAT |
Cor 205 Cor 305 mm
Cor 405 Diamond core drilling Range: Φ15-225mm Two-gear rotary speed is designed, through knob to adjust the speed of shaft. the slow shift is suitable for the drilling bit of large diameter, the quick shift is suitable for the drilling bit of medium and small diameter Ø Equipped with safety clutch and current overload protection switch, which can avoid damaging the machine when the drill is blocked or the twisting force is too long. Ø The lifter is portable to move up and down, the life of the idler wheel is long Ø water kit is included for wet drilling
Direction: On Google Map you can search for ICM Industries and drive here. Rated input power 2600W |
||
 |
Adjustable Aluminium
core drill stand CORA 205 with Core drill machine
Diamond core drilling Range: Φ15-225mm Product Description » Max. Drilling
Diameter: 230MM Both Raw bolt and Vacuum can be used. Price: R 16,495 excl VAT Item no. CORA 205 |
||
|
Angle Core drill machines
CorA300 Max. Drilling Diameter: 300 MM Rated input power 3300 Watt e-mail: icm@lantic.net Both Raw bolt and Vacuum can be used.CorA 300 Angle Price: R19,795 Excl VAT CORA 505 Price: R25,000 Excl VAT |
||
|
For quote please send us email:
icm@lantic.net we do not accept your e mail over the phone.
For Hilti drills you need Adaptors to fit screw type Core barrels.
Direction:
On Google Map you can search for ICM
Industries and drive here. The Adaptor you can buy from Hilti. |
|||
|
For quote please send us email: icm@lantic.net we do not accept your e mail over the phone. Direction: On Google Map you can search for ICM Industries and drive here. |
|
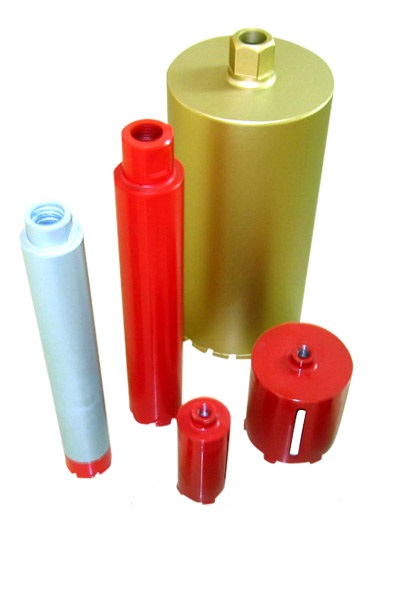
DIAMOND CORE Barrel (BITS) CONNECTION SIZE 1and1/4 inch, 25mm:
20 mm X 250 Core Barrel drill bits Diamond R 440 Excl VAT 24 mm X 250, 300 Core barrel drill bits Diamond R 495 Excl VAT 26 mm X 350 Core barrel drill bits Diamond R575 Excl VAT 32 mm X 350 Core barrel drill bits R625 Excl VAT 36 mm X 350 Core barrel drill bits R695 Excl VAT 38 mm X 350 Core barrel drill bits R725 Excl VAT 44 mm X 350 Core barrel drill bits R755 Excl VAT 53mm X 350 Core drill bit R795 Excl VAT 62mm X 350 Core drill bit R900 Excl VAT 76 mm X 350 Core drill bit R1095 Excl VAT 83 mm X 350 Core barrel drill bits R1,425 Excl VAT 109 mm X 350 Core barrel drill bits R1,525 Excl VAT 114 mm X 350 Core barrel drill bits R1,745 Excl VAT 127 mm X 400 Core drill bit R2,200 Excl VAT 152 mm X 400 Core barrel drill bits R2,245 Excl VAT 159 mm X 400 Core barrel drill bits R2,480 Excl VAT 180 mm X 400 Core barrel drill bits R4,175 Excl VAT |
|
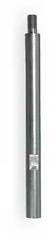 |
200 mm Extension Rod R445 Excl VAT 400 mm Extension Rod R725 Excl VAT Diameter of extension rod 39 mm
|
202 mm X 400 Core barrel drill bits
R4,395 Excl VAT 220 mm X 400 Core barrel drill bits R4,645 Excl VAT 245 mm X 400 Core barrel drill bits R5195 Excl VAT 255 mm X 400 Core barrel drill bits R5,500 Excl VAT 300 mm X 400 Core barrel drill bits R5,545 Excl VAT 350 mm X 400 Core barrel drill bits R5,195 Excl VAT 400 mm X 400 Core barrel drill bits R5,495 Excl VAT |
|
![]()